Showing posts with label ios. Show all posts

Tuesday, March 1, 2016

RK03 - ResearchKit "Hello World" with Instruction Step

"Hello World" with Instruction Step


No software can go forward without a simple "Hello World" application.
If we break this rule, the Gods of "Programming for Dummies" will crush us !
So without any further due lets do some coding !!!

https://gist.github.com/bishalg/c5268460b81344451e44


// 1
   @IBOutlet weak var gettingStartedButton: UIButton!   
// 2
    @IBAction func gettingStartedAction(sender: UIButton) {        self.sayHellowToTheWorld()    }        func sayHellowToTheWorld() {        // Make Steps         let step1 = ORKInstructionStep(identifier: "step1")        step1.title = "Hello World!"                let step2 = ORKInstructionStep(identifier: "step2")        step2.title = "That is it ! :] Thanks"        
                 // Make a Ordered Task of steps
        let task = ORKOrderedTask(identifier: "ourFirstTask", steps: [step1, step2])
                  // Present the ViewController of hence made Task !
        let taskVC = ORKTaskViewController(task: task, taskRunUUID: nil)        taskVC.delegate = self        presentViewController(taskVC, animated: true, completion: nil)    }
// 3
extension HomeVC: ORKTaskViewControllerDelegate {

   func taskViewController(taskViewController: ORKTaskViewController, didFinishWithReason reason: ORKTaskViewControllerFinishReason, error: NSError?) {        self.dismissViewControllerAnimated(true, completion: nil)        let buttonTitle: String?        switch reason {        case .Completed:            buttonTitle = "Completed"        case .Discarded:            buttonTitle = "Discarded"        case .Failed:            buttonTitle = "Failed"        case .Saved:            buttonTitle = "Saved"        }
        gettingStartedButton.setTitle(buttonTitle, forState: .Normal)    }

// 1 - Getting Started -
In our VC we have a button which will start a ResearchKit survey and will change based on our action

// 2 - Action on button will start the survey

If we do "Next" and "Done" after  we started from "Getting Started" button it would present us a Task-ViewController which will make a delegate at the end of it step.

// 3
// Extend out View Controller so that it handles the Delegate of TaskVC
// Once the task is completed we will update our button to reflect the result !
// And finally its our responsibility to dismiss the VC we presented.

Here is one of the expected flow -

1. Home Screen


2. Research Kit - TaskVC presented with "Hello World" Instruction Step ( ORKInstructionStep )


3. Second Instruction Step with "DONE" button - 2/ 2


Finally if we will get any one of the following result ( ORKTaskViewControllerFinishReason ) -
In this case we will have either Completed or Discarded result.


Thursday, February 25, 2016

RK00 - Getting Started with ResearchKit

RK00 - Getting Started with ResearchKit

Published On - 2/25/16, 4:52 AM
Updated On - 3/30/16

I guess as you have already searched for ResearchKit, you need no introduction to it !
But if you really don't know what it is here is an intro for you -

ResearchKit is an open source software framework that makes it easy to create apps for medical research or for other research projects.

Normally when we start to develop iOS app the first place we start to search for tutorial is Raywenderlich. No wonder there is already one on ResearchKit ! Believe me only other place to learn about ResearchKit is one WWDC video from apple and that is it :[.

Other learning resources we should follow is the ResearchKit blog. And as always there is StackOverflow to get around.

But in this tutorial series I would not use conventional tutorial.  Like intro to ResearchKit, for which you can always follow apple documentation. Rather I would make you go thought the app that is already on App Store and hence at the end you can make your own app ;]. For which I would use open Gluco Sucess app. But the fun part is I wont make you follow same app ! Instead we would make a app for COPD called StopCOPD which isnt OpenSource app.

So lets get started !

RK01 - ResearchKit - App Store Apps - diagnostic
RK 02 - ResearchKit - Native App on HTML ?
RK03 - ResearchKit "Hello World" with Instruction Step


Links -

http://www.apple.com/researchkit/
http://www.raywenderlich.com/104575/researchkit-tutorial-with-swift
http://researchkit.org
http://researchkit.org/blog.html
https://developer.apple.com/videos/play/wwdc2015/213/
http://stackoverflow.com/questions/tagged/researchkit?sort=newest&pageSize=50
http://researchkit.org/docs/docs/Overview/GuideOverview.html

https://github.com/researchkit/researchkit
https://github.com/ResearchKit/GlucoSuccess
https://itunes.apple.com/us/app/stopcopd/id1020845469?mt=8

Friday, September 11, 2015

Swift 2.0 Strings


After functional coding I feel the biggest change from Obj-C world to Swift was in support of Unicode string.

Then again the huge change from Swift 1.2 to Swift 2.0 might be in String.
In someway its a dramatic change !
As stated in Swift Blog

Swift provides a performant, Unicode-compliant string implementation as part of its Standard Library. In Swift 2, theString type no longer conforms to the CollectionType protocol, where String was previously a collection of Character values, similar to an array. Now, String provides a characters property that exposes a character collection view.


var letters: [Character] = ["c", "a", "f", "e"]
var string: String = String(letters)

print(letters.count) // 4
print(string) // cafe
print(string.characters.count) // 4


let acuteAccent: Character = "\u{0301}" // ´ COMBINING ACUTE ACCENT' (U+0301)

string.append(acuteAccent)
print(string.characters.count) // 4
print(string.characters.last!) // é


https://developer.apple.com/library/ios/documentation/Swift/Conceptual/Swift_Programming_Language/StringsAndCharacters.html


NOTE
Extended grapheme clusters can be composed of one or more Unicode scalars. This means that different characters—and different representations of the same character—can require different amounts of memory to store. Because of this, characters in Swift do not each take up the same amount of memory within a string’s representation. As a result, the number of characters in a string cannot be calculated without iterating through the string to determine its extended grapheme cluster boundaries. If you are working with particularly long string values, be aware that the count(_:) function must iterate over the Unicode scalars in the entire string in order to calculate an accurate character count for that string.


The character count returned by the count(_:) function is not always the same as the length property of an NSString that contains the same characters. The length of an NSString is based on the number of 16-bit code units within the string’s UTF-16 rpresentation and not the number of Unicode extended grapheme clusters within the string. To reflect this fact, the length property from NSString is called utf16Count when it is accessed on a Swift String value.

Reference - 

Tuesday, September 1, 2015

Catching generic Exceptions in Swift 2.0

Erro handeling is always a chalange in any development enviroment.


In general, we will never spot an error if we log or catch. Only developers will see those, and if you're muffling to avoid user-visible behavior, succeeding means nobody will notice!

So our guideline is: 
"if it's something wrong that we want to fix, let it crash, find and fix before release. "

If it's something wrong that might seriously impact the user experience, or is not indicative of a programming error, then muffle but make sure we have a test or some other way to find the problem. 

Or make sure that failure propagates around the application through some other kind of logic — return values, fall through, whatever. 

Also: if you write 'catch Exception', consider writing 'Throwable' instead. I often see this:

  // This might run out of memory. 
  catch (Exception e) {

which won't work — Exception and Error are siblings, and OOMs are OutOfMemoryErrors. That'll catch everything but an Error!

I am a huge fan of open source Firefox iOS Developed in Swift and consider it as an inspiration.
I found the following discussion on bugzilla 

Inspired by buzilla form - 

Richard Newman 
https://mail.mozilla.org/pipermail/mobile-firefox-dev/2015-August/001451.html

Bugzilla - https://bugzilla.mozilla.org/show_bug.cgi?id=1191067#c25
Github - https://github.com/mozilla/firefox-ios

Thursday, August 6, 2015

Windows Bridge - Objective-C iOS app Development in Microsoft Windows

The most popular question you get asked as an iOS developer is - "Is it possible to make iOS app in Windows ?" :[
But the sad and short answer was always NO !
Now if the question is "Is is possible to develop in Windows using Objective-C ?", the answer will be "Yes !" :]

There are other options like using virtual machine or running www.hackintosh.com

But Now there is a better way around, No ! I'm now talking about open source Swift coming to Linux later this year.
But today Microsoft has open sourced WinObjC.

NOTE :  That this is to help and expand develop app on Windows Platform not to develop iOS app ! 
Rather it is developed as helper to convert existing iOS app to Windows Platform.

Email Newsletter -

Windows Bridge for iOS: Initial preview now on GitHub!
 
We have great news to share about Windows Bridge for iOS ('Project Islandwood').
We just made a few big announcements about the bridge, and we wanted to be sure you were among the first to find out. First, we announced availability of an initial preview release of the technology to target Windows PCs running Windows 8.1 and Windows 10. Secondly, we announced that we are targeting fall for a full release, in conjunction with the update to Visual Studio 2015.
But the biggest announcement is that we are releasing the bridge as an open source project under the MIT license, and making it available on GitHub. We invite you to check out the project on GitHub and follow our progress as we work towards our fall release. The team is very excited to share the iOS bridge with you, and we hope you'll follow along with us.
For additional information, check out the detailed Windows Bridge for iOS blog post and be sure to check us out at GitHub.
 
Thank you, The Windows Bridge for iOS Team


And the GitHub description -

Welcome to the Windows Bridge for iOS project preview

What is WinObjC?

Windows Bridge for iOS (also referred to as WinObjC) is a Microsoft open source project that provides an Objective-C development environment for Visual Studio/Windows. In addition, WinObjC provides support for iOS API compatibility.
The following sections will help you get started and you can view our wiki for more detailed information.

Where to get it

Download the Windows Bridge for iOS SDK here

Getting started with WinObjC

To use WinObjC, there are a few requirements. You need:
  • Windows 10
  • Visual Studio 2015 with Windows developer tools. Visual Studio 2015 Community is available for free here. Select (at least) the following components during installation:
    1. Programming Languages -> Visual C++
    2. Universal Windows App Development Tools (all)
    3. Windows 8.1 and Windows Phone 8.0/8.1 Tools (all)
The best way to get started with WinObjC is to run one of the samples. We recommend starting with the WOCCatalog sample app, which demonstrates an assortment of iOS and XAML UI controls. To run the sample:
  1. Extract the SDK zip file to a local directory
  2. Navigate to winobjc/samples/WOCCatalog in the extracted directory
  3. Double-click on WOCCatalog-WinStore10.sln to open in VS2015
  4. In VS2015 right-click on the WOCCatalog (Universal Windows) project
  5. Select Set as StartUp project
  6. Use Ctrl-F5 to build and run the app
For guidance about importing your own Xcode project and other Windows Bridge for iOS SDK details, see the wiki

Contributions

There are many ways that you can contribute to the WinObjC project:
  • Submit a bug
  • Verify fixes for bugs
  • Submit a code fix for a bug
  • Submit a feature request
  • Submit a unit test
  • Tell others about the WinObjC project
  • Tell the developers how much you appreciate the project

Pull requests

You will need to sign a Contribution License Agreement (CLA) before submitting your pull request. To complete the CLA, you will need to submit the request via the form and then electronically sign the CLA when you receive an email containing a link to the document.
This process needs to only be done once for any Microsoft open source project.

Contributing to README and Wiki

You do not need to sign a Contribution License Agreement if you are just contributing to the README or the Wiki. However, by submitting a contribution to the README or the Wiki, you are contributing it under the Creative Commons CC0 1.0 Universal Public Domain Dedication.

What's still under development?

As this project is still under active development, there are a few features that are not yet built out:
  1. x86 only today ARM support coming soon
  2. Compiler optimizations will not work and will likely crash clang, debug builds only
  3. Autolayout
  4. Storyboard support
  5. MapKit
  6. AssetsLibrary
  7. AddressBook
  8. Ads
  9. Objective-C annotations
  10. Media Capture and Playback

Problems?

If you have any questions, we're listening and will do our best to help. Just go tohttp://stackoverflow.com/ and tag your questions with WinObjC. You can also get more information at our wiki

Directory structure

  • bin/ : Various prebuilt tools
  • build/ : Projects/solutions to build the SDK
  • deps/ : Open source dependencies
    • prebuilt/ : Prebuilt binaries for various architectures
  • Frameworks/ : Implementation of iOS-style Frameworks
  • include/ : SDK headers (including headers for iOS-style Frameworks)
    • Platform/ : Headers for Windows Objective-C bindings for various OS versions
  • msvc/ : Visual Studio integration files
  • samples/ : Assorted samples
  • tools/ : Source code to tools

Tuesday, July 28, 2015

TestFlight Beta Testing Guidelines


TestFlight Beta Testing Guidelines


1. First thing to note is that test flight approval does not mean final iTunes app approval. 
2. The time Apple takes to review test flight build is only 1-2 business days where as an App store approval ranges from 5-15 business days. Normally its 6 days but during new product lunch iPhone / iPad ( mid Sep & Oct ) and  launch or especial event like WWDC ( Jun )  or during holidays ( Dec ) the time can increase as store even remain close for some time. 
3. The distribution of iOS app is done via TestFlight. It is the app available in iOS App store from Apple, which will help user get latest TestFlight Builds. 
  • Distribute prerelease builds of your app to testers to collect feedback and prepare your app for release in the App Store.
  • TestFlight beta testing in iTunes Connect is available only for iOS apps.
  •  You can enable TestFlight beta testing for up to 10 apps at one time in your developer account.
  •  Distribute the app to internal testers. 
  • Submit the app for Beta App Review, and distribute it to External users.
  • The build will be available to them for 30 days after the invitations are sent.

Difference Between Internal Testers and External User 
Internal test
  • Does not require App approval from apple.
  • You are not required to supply all metadata in order to invite internal testers to test a prerelease build of your app.
  • You can enable up to 25 users from your iTunes Connect team to be internal testers 
  • To be eligible to become an internal tester, a user must be part of your iTunes Connect team with the Admin, Legal, or Technical role. Adding iTunes Connect users and setting their roles. 
External test
  • You can enable up to 1000 users to be external testers per app.
  • External testers do not need to be in your organization; you can invite any user with an email address to become one of your external testers.
  • You’ll need an email address for each tester and optionally their first and last names. 
  • Your app must pass Beta App Review before you can invite your external testers to test it 
  • To enable external users to test a prerelease build of your app, you must supply the following metadata
    • What to test
    • App description
    • Feedback email
    • Marketing URL
    • Support URL
    • Privacy policy URL (optional)
    • Beta App Review contact information
    • Beta App Review notes (optional)

Submit to the App Store
When you are done using TestFlight beta testing, you can submit the app for final review. Before you submit it, make sure you no longer want to test it or any builds you uploaded earlier than it. When the app becomes Ready for Sale in the App Store, testing automatically stops on earlier builds, and you will be unable to view or test them.
If you want to resume testing of an earlier build, you can upload it as a new build associated with a new prerelease version.
Link - 

Wednesday, June 10, 2015

iOS9 Beta1 on iPhone6 Preview

Finally iOS9 is out in Beta. 
First thing you turn on your mobile after all the setup is the Passcode of length 6 !
I'm quite unhappy with this change. As I think as soon as fingerprint doesn't work i need to try the passcode. And remembering 6 digit passcode is quite difficult :[


Swipe Left for search just like Android Now :P
Not-thing like advanced feature of Android's NOW but its the basic start.


Now setting has its own search bar !


Another feature from Android :] ... Low batter. ie Low Power Mode !


BOOM ! Blank screen !!! Beta software test !!!

Multitasking is so cool. Its feel smooth. Yet again its quite inspired from Android but It has new feel, and quite useful one.


Another view of Multi-task.


Search


Siri in search


Siri in action like Apple Watch Design 


If you open any app it will give you option to go back to previous app :]
How cool. Most people using Android are used to using Back Button at bottom right.
Its almost similar, quite useful.


SlideShow in Moment.


Thumbnail preview of images. Another quite useful feature with smooth scroll.


Wednesday, February 5, 2014

Facebook gestured based iOS app Paper


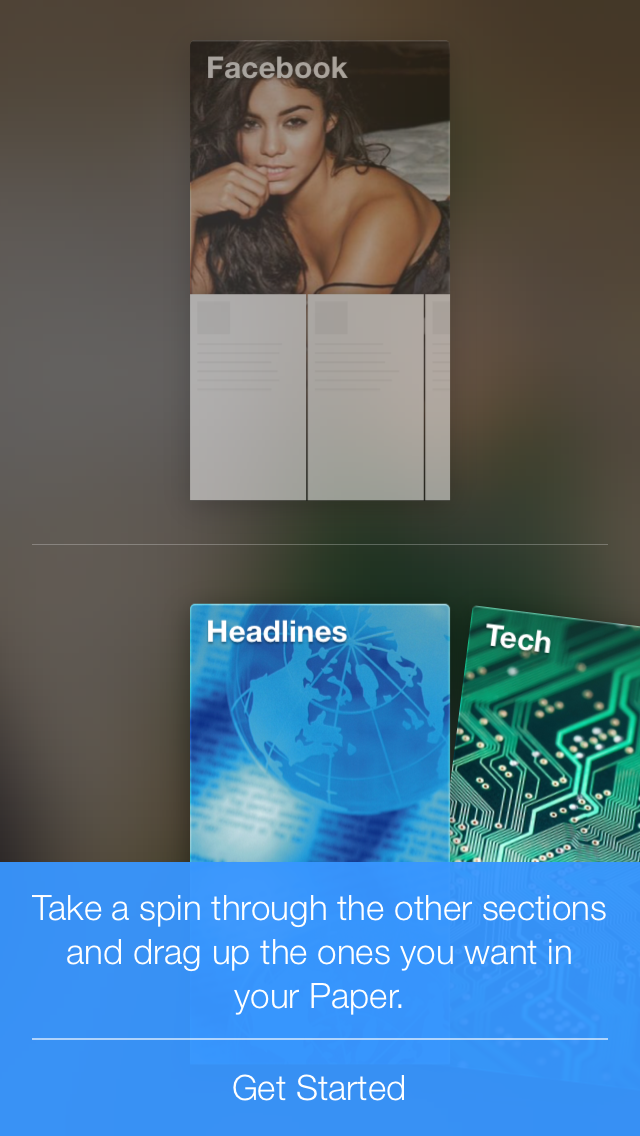
1. First load is video ! The app itself is 50+Mbs !!!


2. The Next Splash Screen is a Paper logo on a blur Background


3. Then its all voice guide which is titles block of which you can customise.


The Blue Bar is a Help to teach you how to use the app.


For now its is only available only in iOS and for user with USA as a country !
Hope it will come to android soon. And you can easily change the store of your iOS account in setting.

App Store Link
Change iOS App store country.


Saturday, October 5, 2013

Passbook App Development for iOS

Passbook is a new technology introduced in iOS6 and be quite tricky technology at first to master.
But here are few link to tutorials and helps that I hope will ease your pain.

Server API Sevices :
http://www.passdock.com/passbook-coupon/walmart-sales-coupon
http://passkit.com/

Tutorials :
http://www.raywenderlich.com/20734/beginning-passbook-part-1
http://www.raywenderlich.com/20785/beginning-passbook-in-ios-6-part-22
http://blogs.captechconsulting.com/blog/jonathan-tang/ios-6-tutorial-integrating-passbook-your-applications

Github Open source Codes :
https://github.com/passslot/passslot-ios-sdk

Design Passbook :
https://create.passkit.com/

Apple Developer Site Links:

iOS: Using Passbook
http://support.apple.com/kb/HT5483?viewlocale=en_US&locale=en_US

Passbook FAQ
https://developer.apple.com/library/ios/technotes/tn2302/_index.html

App Store Review Guidelines
23. Passbook
  • 23.1
    Passbook Passes can be used to make or receive payments, transmit offers or offer identification (such as movie tickets, airline tickets, coupons and reward offers). Other uses may result in the rejection of the App and the revocation of Passbook credentials
  • 23.2
    Passes must include valid contact information from the issuer of the pass or the App will be rejected and Passbook credentials may be revoked
  • 23.3
    Passes must be signed by the entity that will be distributing the pass under its own name, trademark, or brand or the App will be rejected and Passbook credentials may be revoked
PDFs:
Add to Passbook Badge
https://developer.apple.com/passbook/AddToPassbookBadgeGuidelines.pdf
Getting Started with Passbook on iOS 6
https://developer.apple.com/passbook/Getting_Started_with_Passbook.pdf

WWDC Videos:
https://developer.apple.com/wwdc/videos/?id=302
https://developer.apple.com/wwdc/videos/?id=303
https://developer.apple.com/videos/wwdc/2012/?id=301
https://developer.apple.com/videos/wwdc/2012/?id=309

Ebooks :
http://www.packtpub.com/passbook-applications-development-for-ios/book

Example Pass


Wednesday, September 25, 2013

Avoid Keyboard in UITableView Cell

The best solution to avoid keyboard in iOS in table view are to use framework called TPKeyboardAvoid https://github.com/michaeltyson/TPKeyboardAvoiding

But, if you need some manual solution here are few codes

-(void) viewDidAppear:(BOOL)animated {
    [super viewDidAppear:YES];
    [[NSNotificationCenter defaultCenter] addObserver:self
                                             selector:@selector(keyboardWillShow:)
                                                 name:UIKeyboardWillShowNotification
                                               object:nil];
    
    [[NSNotificationCenter defaultCenter] addObserver:self
                                             selector:@selector(keyboardWillHide:)
                                                 name:UIKeyboardWillHideNotification
                                               object:nil];

}

-(void) viewDidDisappear:(BOOL)animated  {
    [super viewDidDisappear:YES];
    blogParser.delegate = nil;
    [[NSNotificationCenter defaultCenter] removeObserver:self name:UIKeyboardWillShowNotification object:nil];
    [[NSNotificationCenter defaultCenter] removeObserver:self name:UIKeyboardWillHideNotification object:nil];
}

-(CGFloat)getLabelHeightForIndex:(NSInteger)index
{
    CGSize maximumSize = CGSizeMake(230, 10000);
    Blog_Comment *comment = comments[index];
    
    CGSize labelHeighSize = [comment.comment sizeWithFont: [UIFont fontWithName:@"Helvetica" size:12.0f]
                                     constrainedToSize:maximumSize
                                         lineBreakMode:NSLineBreakByCharWrapping];
    return labelHeighSize.height;
    
}

#pragma mark - Notification 

-(void) moveTableViewBottomRowUp:(NSNotification *)note {
    NSDictionary *userInfo = [note userInfo];
    CGSize kbSize = [[userInfo objectForKey:UIKeyboardFrameBeginUserInfoKey] CGRectValue].size;
    kKeyboardHeight = kbSize.height;
    
    NSTimeInterval duration = [[userInfo objectForKey:UIKeyboardAnimationDurationUserInfoKey] doubleValue];
    [UIView animateWithDuration:duration animations:^{
        UIEdgeInsets edgeInsets = UIEdgeInsetsMake(0, 0, kbSize.height, 0);
        [_tableView setContentInset:edgeInsets];
        [_tableView setScrollIndicatorInsets:edgeInsets];
//        [_tableView scrollToRowAtIndexPath:[NSIndexPath indexPathForRow:[_tableView numberOfRowsInSection:0]-1 inSection:0]
//                          atScrollPosition:UITableViewScrollPositionTop
//                                  animated:YES];
    }];
}

-(void) moveTableViewBottom2Normal:(NSNotification *)note {
    NSDictionary *userInfo = [note userInfo];
    NSTimeInterval duration = [[userInfo objectForKey:UIKeyboardAnimationDurationUserInfoKey] doubleValue];
    
    [UIView animateWithDuration:duration animations:^{
        UIEdgeInsets edgeInsets = UIEdgeInsetsZero;
        [_tableView setContentInset:edgeInsets];
        [_tableView setScrollIndicatorInsets:edgeInsets];
    }];
}

-(void) assignKeyBoardHeigh:(NSNotification *) note {
    NSDictionary *userInfo = [note userInfo];
//    NSTimeInterval duration = [[userInfo objectForKey:UIKeyboardAnimationDurationUserInfoKey] doubleValue];
    CGSize kbSize = [[userInfo objectForKey:UIKeyboardFrameBeginUserInfoKey] CGRectValue].size;
    kKeyboardHeight = kbSize.height;
}

-(void) keyboardWillShow:(NSNotification *)note {
    [self assignKeyBoardHeigh:note];
    [self moveTableViewBottomRowUp:note];
    [self moveTextFieldUp];
}

-(void) keyboardWillHide:(NSNotification *)note {
//    [self moveTableViewBottom2Normal:note];
    [self moveTexyFieldDown];
}


-(void) moveTextFieldUp {
    [UIView beginAnimations:@"ResizeForKeyboard" context:nil];
    [UIView setAnimationDuration:0.2];
    CGRect frame = viewComment.frame;
    frame.origin.y = self.view.bounds.size.height - kKeyboardHeight - frame.size.height;
    viewComment.frame = frame;
    // DLog(@"%f", viewComment.frame.origin.y);
    [UIView commitAnimations];
}

-(void) moveTexyFieldDown {
    [UIView beginAnimations:@"ResizeForKeyboard" context:nil];
    [UIView setAnimationDuration:0.2];
    CGRect frame = viewComment.frame;
    frame.origin.y = self.view.bounds.size.height - frame.size.height;
    viewComment.frame = frame;
    
    // DLog(@"%f", viewComment.frame.origin.y);
    [UIView commitAnimations];
}


http://iphoneimei.info/